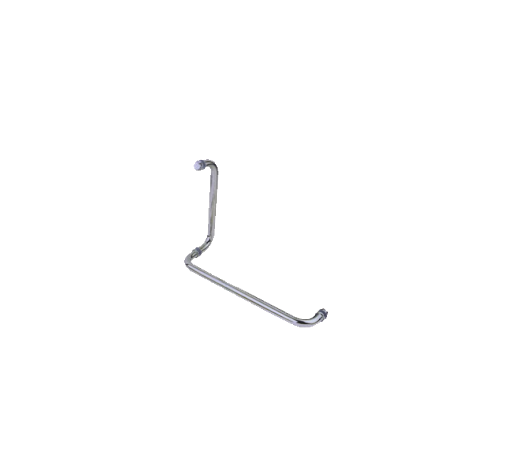
EBCO Shower Fittings Door handle. This designer Door Pull Handle is available in Brush steel of Size Dia. 19mm x150mmx450mm. We offer a variety of door handles manufactured using superior quality raw material (stainless steel). So you can choose from a wide range of varieties of Pull Handles that can be used with Glass Doors .
Great Handle for Shower Fittings Doors. Can be used as Pull Handle for Shower Doors in your home. Pre-drilling is not recommended. All installation hardwares are included in the package. Installation of this Door Hardware is simple and quick. Sold for a Each.
*If you have any specific question related to the product, please contact us.
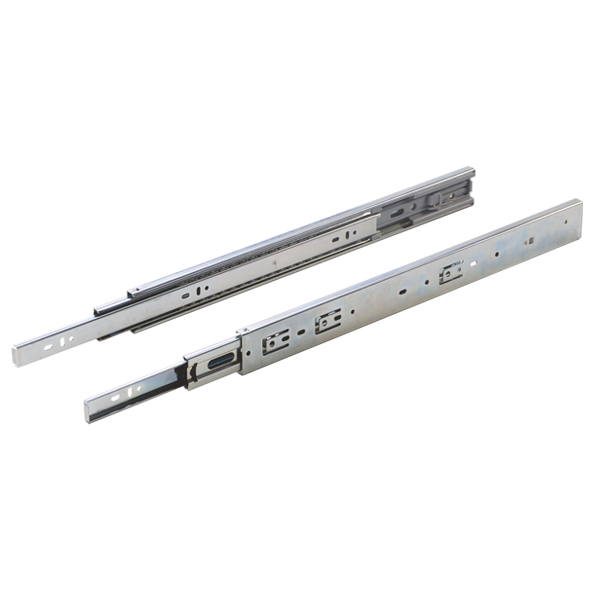
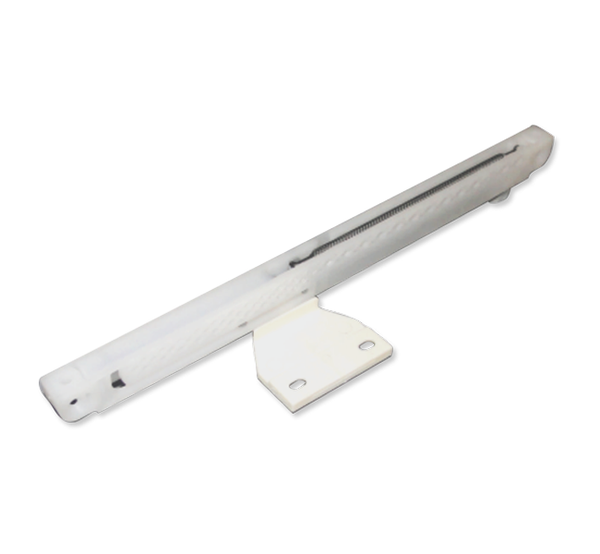
To install sleek telescopic drawer slide soft close 12.7 to13.0mm gap per side is required between cabinet and drawer. (Refer Fig. 1)Depress latch and remove the inner slide. (Refer Fig. 2)Fit outer (fixed) slide onto the inside of the cabinet, access to holes can be got through slots in intermediate slide.Slides should be fitted parallel and screws tightened fully to avoid gaps.Fit inner slide onto the outside of the drawer.Now slide the drawer with inner slide fitted on to the intermediate slides on the cabinet till the latch will automatically engage.
*If you have any specific question related to the product, please contact us.
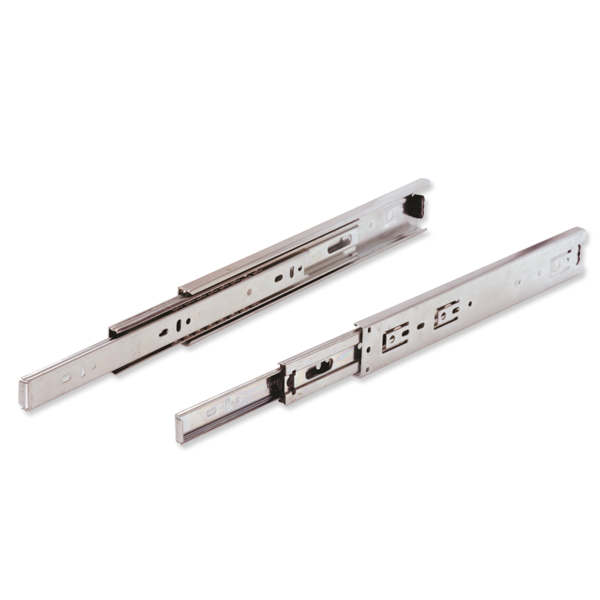
To install sleek telescopic drawer slide 12.7 to 13.0mm gap per side is required between cabinet and drawer. (Refer Fig. 1)Depress latch and remove the inner slide. (Refer Fig. 2)Fit outer (fixed) slide onto the inside of the cabinet, access to holes can be got through slots in intermediate slide.Slides should be fitted parallel and screws tightened fully to avoid gaps.Fit inner slide onto the outside of the drawer.Now slide the drawer with inner slide fitted on to the intermediate slides on the cabinet till the latch will automatically engage.
*If you have any specific question related to the product, please contact us.
To install sleek telescopic drawer slide 12.7 to13.0mm gap per side is required between cabinet and drawer. (Refer Fig. 1)Depress latch and remove the inner slide. (Refer Fig. 2)Fit outer (fixed) slide onto the inside of the cabinet, access to holes can be got through slots in intermediate slide.Slides should be fitted parallel and screws tightened fully to avoid gaps.Fit inner slide onto the outside of the drawer.Now slide the drawer with inner slide fitted on to the intermediate slides on the cabinet till the latch will automatically engage.
*If you have any specific question related to the product, please contact us.
To install sleek telescopic drawer slide 12.7 to 13.0mm gap per side is required between cabinet and drawer. (Refer Fig. 1)Depress latch and remove the inner slide. (Refer Fig. 2)Fit outer (fixed) slide onto the inside of the cabinet, access to holes can be got through slots in intermediate slide.Slides should be fitted parallel and screws tightened fully to avoid gaps.Fit inner slide onto the outside of the drawer.Now slide the drawer with inner slide fitted on to the intermediate slides on the cabinet till the latch will automatically engage.
*If you have any specific question related to the product, please contact us.
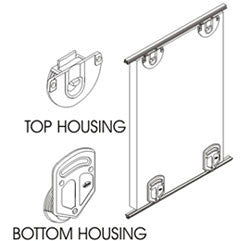
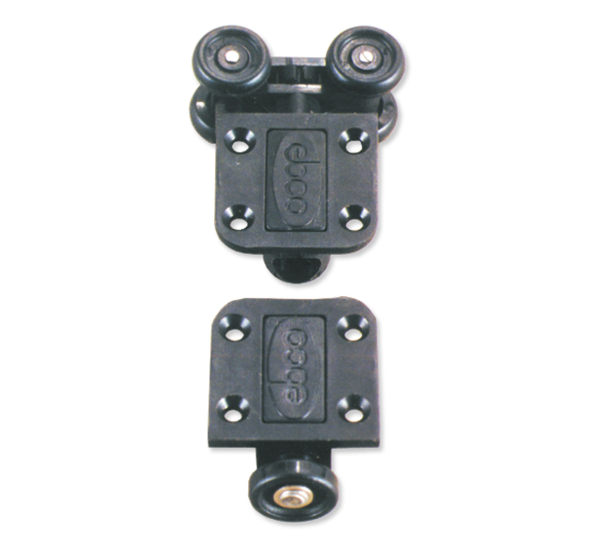
Use Ø35mm cutter to make cavities on the inside of shutter. (Refer Fig.1).Cavity should be 10mm deep.Fit top housing and bottom housing in top and bottom cavities respectively.Rail is fitted in a slot at top and bottom of cabinet. Groove should be 8mm wide and 6mm deep. (Refer Fig.2).Wheel of bottom housing should sit in bottom rail.Spring loaded guide in top housing is pulled down so as to engage in top rail there by retaining the shutter. (Refer Fig.3).
*If you have any specific question related to the product, please contact us.
One set is for one sliding shutters.Set of two sliding fittings with four wheels, each are fitted on top rack. (Refer fig.1).Set of two sliding fittings with one wheel, each are fitted on bottom track. (Refer fig.2).Cavities for sliding fittings are made at the four extreme ends of shutter. (Refer fig.3).Center distance between two rails should be 40 mm min. (Ref. Fig.4) IMPORTANT: TO BE ORDERED WITH THE ALUMINIUM RAILS. CODE NO. SFFA1.
Fittings Instruction :- Standard model is provided with Hangers (2 nos.) Which are fitted at the top of the door (Ref. Fig. 1).The bottom guides (2 Nos.) are fitted on the floor. The groove required in the door is 9mm wide and 12mm deep (Ref. Fig 2.).The catch is fitted in the aluminium section at both ends and can be adjusted for pressure. (Ref. Fig 3).The door is hung on the sliding fitting and flange nut is tightened. Height adjustment of 14mm is available (Ref. Fig. 2).Optional wall mounting brackets are available. This is to be fitted every 600mm on aluminium section (Ref. Fig. 4).
Fittings Instruction :- Standard model is provided with Hangers (2 nos.) Which are fitted at the top of the door (Ref. Fig. 1).The bottom guides (2 Nos.) are fitted on the floor. The groove required in the door is 9mm wide and 12mm deep (Ref. Fig 2.).The catch is fitted in the aluminium section at both ends and can be adjusted for pressure. (Ref. Fig 3).The door is hung on the sliding fitting and flange nut is tightened. Height adjustment of 14mm is available (Ref. Fig. 2).Optional wall mounting brackets are available. This is to be fitted every 600mm on aluminium section (Ref. Fig. 4).
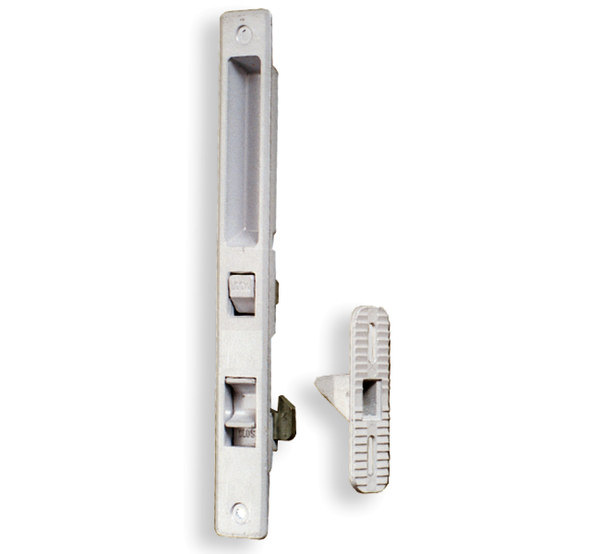
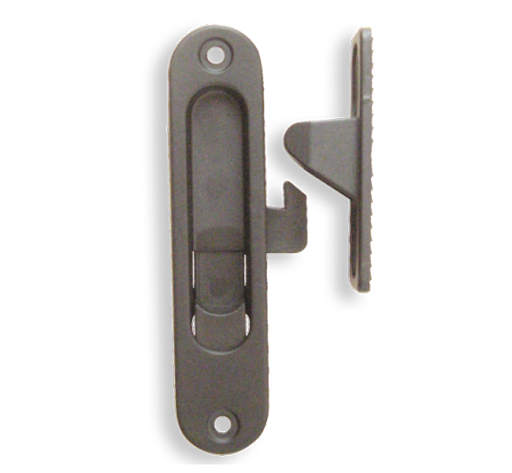
Body is fitted onto the sliding window shutter into a cavity made of 19 mm x 80 mm. (Ref. Fig.1)Catch is fitted on the frame. (Ref. Fig.1)..An opening of 13mm x 25mm is required in the width of the section for the catch to engage with the hook.(Ref. Fig.1)..Catch is fitted on the inside of the frame such that it engages with the hook when window is shut.(Ref. Fig.2)
1.Cut two Cavities in Shutter as shown in Fig.1.Screw on the Bumpers to the Shutter as shown in Fig.2. for approx. dimensions refer Fig.1. Insert the lower part of the Body in to cavity in Shutter and Click on the upper part of the Body as shown in Fig.3. Insert the Hook into the body through the side cavity in the shutter as shown in Fig. 4. Push the Slider downward & tighten the Grub screw with Allen key as shown in Fig. 5. Fit the Catch into the Frame as shown in Fig. 6. To remove the body from shutter, unscrew the grub screw & remove the Hook first & then insert a flat thin screw driver into the thin slot provided in the body & compress the spring.