
Rs. 228.00
The Ebco Mortise Window Handle with Lock 3 (AWH-DML3) is a premium window fitting designed for aluminium windows that demand both security and style. Available exclusively at KnobsKart.
| Model | Code | Size | Finish |
|---|---|---|---|
| Mortise Window Handle - with Lock 3 | AWH-DML3 | Ø70 mm | White / Black |
The Ebco Mortise Window Handle 3 (AWH-DM3) is a reliable and ergonomic window handle designed for aluminium windows requiring multi-point locking. Available at KnobsKart.
| Model | Code | Size | Finish |
|---|---|---|---|
| Mortise Window Handle - 3 | AWH-DM3 | Ø41 mm | White / Black |
Shop premium window hardware at KnobsKart.com — your trusted destination for quality door & window fittings.

Rs. 365.00
The Ebco Aluminium Window Handle Deluxe 2 is a premium window fitting crafted for aluminium windows that demand both elegance and durability. Available at KnobsKart in Left (L) and Right (R) orientations.
| Model | Code | Size | Finish |
|---|---|---|---|
| Al Window Handle Deluxe2 (R) | AWH-D2R | Ø40 mm | White / Black |
| Al Window Handle Deluxe2 (L) | AWH-D2L | Ø40 mm | White / Black |
Shop premium window hardware at KnobsKart.com — your trusted destination for quality door & window fittings.
Rs. 399.00
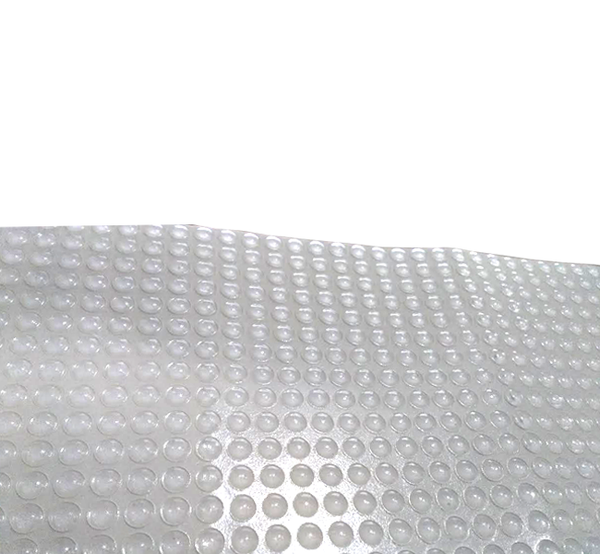
Non-Staining & Non-Marring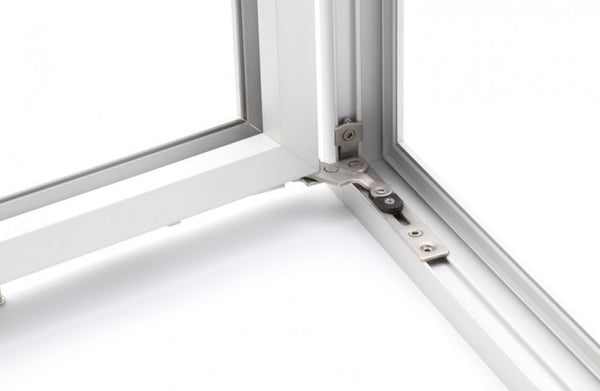
Rs. 527.00
With a new bevelled groove. Used for aluminium windows with Euro Groove 1 (Frame) and Euro Groove 2 (Shutter
| Item | Code | Size | Finish |
| Concealed Corner Hinge side Hung - 80 (with New Bevelled Groove) | CCH-SH-80 | 2 mm | SS 304 |
| Concealed Corner Hinge side Hung - 120 (with New Bevelled Groove) | CCH-SH-120 | 3 mm | SS 304 |

Rs. 396.00
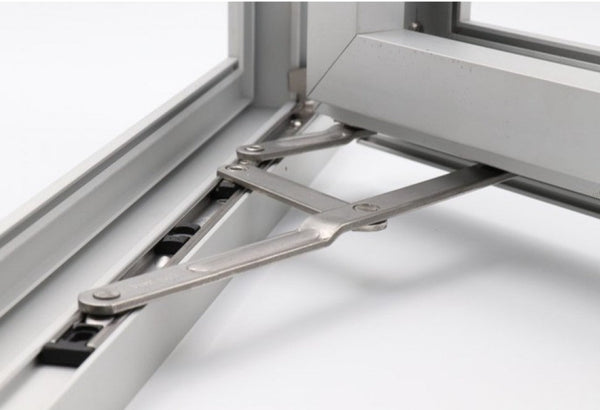
The Ebco Friction Stay - Hi Load SS 304, available exclusively at KnobsKart, is engineered for heavy-duty window applications. Made from AISI SS304 stainless steel, it delivers superior corrosion resistance and long-lasting durability in demanding environments.
| Item Code | L | Side Hung | Top Hung | Load (kgs) | Max Opening Angle | Gap for Stays 'A' mm | Min Width 'B' mm | No of Bars | ||
|---|---|---|---|---|---|---|---|---|---|---|
| Max Shutter Width (mm) | Max Shutter Height (mm) | Max Shutter Width (mm) | Max Shutter Height (mm) | |||||||
| FRS8HL | 205 (8 inch) | N.A | N.A | 750 | 300 | 13 | 90° | 15 | 19 | 4 |
| FRS10HL | 255 (10 inch) | 450 | 900 | 900 | 450 | 21 | 90° | 15 | 19 | 4 |
| FRS12HL | 305 (12 inch) | 500 | 950 | 950 | 500 | 24 | 90° | 15 | 19 | 4 |
| FRS14HL | 355 (14 inch) | 550 | 1000 | 1050 | 550 | 30 | 90° | 15 | 19 | 5 |
| FRS16HL | 405 (16 inch) | 600 | 1050 | 600 | 1270 | 30 | 90° | 18 | 22 | 5 |
| FRS20HL | 510 (20 inch) | N.A | N.A | 700 | 1525 | 38 | 30/90° | 18 | 22 | 5 |
| FRS24HL | 610 (24 inch) | N.A | N.A | 800 | 2000 | 44 | 30/90° | 18 | 22 | 5 |
| FRS28HL | 710 (28 inch) | N.A | N.A | 900 | 2000 | 50 | 25/65° | 18 | 22 | 5 |
Rs. 578.00
| Side Hung | Top Hung | Finish | ||||||||||
| Model | Code | size(Lenght)mm | Max.Shutter Width (mm) | Max.Shutter Height (mm) | MaxShutter Width (mm) | Max.Shutter Height (mm) | Load(kgs) | Max.Opening angle | Gap for Stays(mm) | Min.Width for Stays (mm) | No.of bars | |
| Friction Stay 1319(for aluminium windows with euro groove) | FRS1319-10 | 250 | 400 | 700 | NA | NA | 18 | 88 | 21 | 280 | 4 | SS 304 |
| FRS1319-12 | 300 | 450 | 900 | NA | NA | 22 | 88 | 21 | 330 | 4 | ||
| FRS1319-14 | 350 | 500 | 1000 | NA | NA. | 25 | 88 | 21 | 380 | 4 | ||
Rs. 174.00
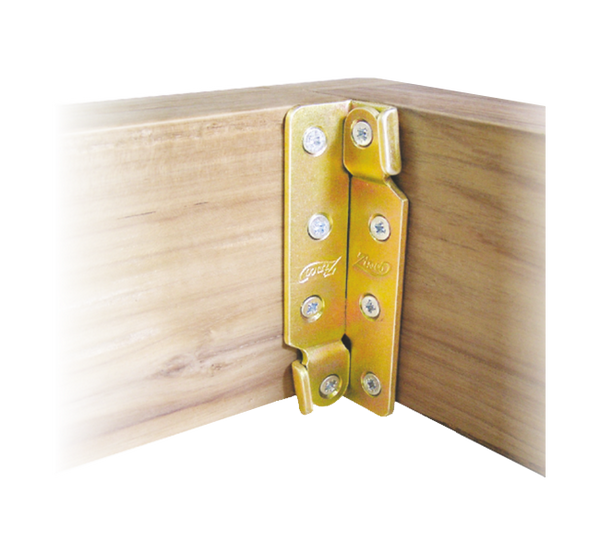
Manufactured out of steel for strength
Clips easily in to each other forming a strong joint
Require four joints to form a bed frame.
Finish is Zinc Plated.

Rs. 2,310.00
| Specification | |
|---|---|
| Size | 3ft regular PLBF-EF-R, With Gas Lift PLBF 150C (KG) |
| Finish | Black |
| Set | Pair |
*If you have any specific question related to the product, please contact us.

Rs. 2,314.00
| Specification | |
|---|---|
| Size | 3ft regular PLBF-EF-R, With PLBF 75C (KG) |
| Finish | Black |
| Set | Pair |
*If you have any specific question related to the product, please contact us.
Rs. 779.00
| Specification | |
|---|---|
| Finish | Silver |
| Pcs./set | Pair |
*If you have any specific question related to the product, please contact us.
*Special Note:
Installation dimension are only recommendation and will vary depending on type of construction design.
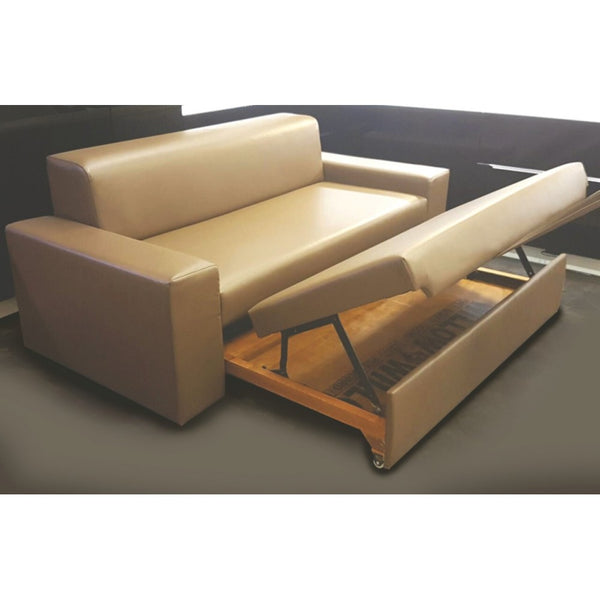
Rs. 1,695.00
are a set of mechanisms that allow you to convert a sofa into a bed. They are made of durable steel and are easy to install. The fittings come with a variety of handles, so you can choose the one that best suits your style.
The Pro-Lift Sofa Bed Fittings are perfect for small spaces, as they allow you to have a comfortable bed without taking up too much room. They are also great for guests, as they provide a quick and easy way to create a bed.
To install the Pro-Lift Sofa Bed Fittings, you will need to drill a few holes in your sofa. Once the holes are drilled, you can insert the fittings and secure them with screws. The fittings come with detailed instructions, so you should be able to install them without any problems.
Once the fittings are installed, you can convert your sofa into a bed by lifting the seat cushion and sliding it out. The bed will be supported by the fittings, so you don't have to worry about it collapsing.
The Pro-Lift Sofa Bed Fittings are a great way to add versatility to your furniture. They are easy to install and use, and they can help you save space in your home.
Here are some of the features and benefits of the Ebco Pro-Lift Sofa Bed Fittings:
If you are looking for a way to convert your sofa into a bed, the Ebco Pro-Lift Sofa Bed Fittings are a great option. They are durable, easy to install, and come with a variety of handles to choose from.
| Model | Code | Size | Finish |
| Pro Lift Sofa Bed Fittings | PLSB1 | Thk: 3.0mm & 4.0mm | Anthracite |

Rs. 3,360.00
| Specification | |
|---|---|
| Size | 5ft Extended Arm PLBF-EF-E, With PLBF 120C (KG) |
| Finish | Black |
| Set | Pair |
*If you have any specific question related to the product, please contact us.

Rs. 2,314.00
| Specification | |
|---|---|
| Size | 3ft regular PLBF-EF-R, Gas lift PLBF 120C (KG) |
| Finish | Black |
| Set | Pair |
*If you have any specific question related to the product, please contact us.
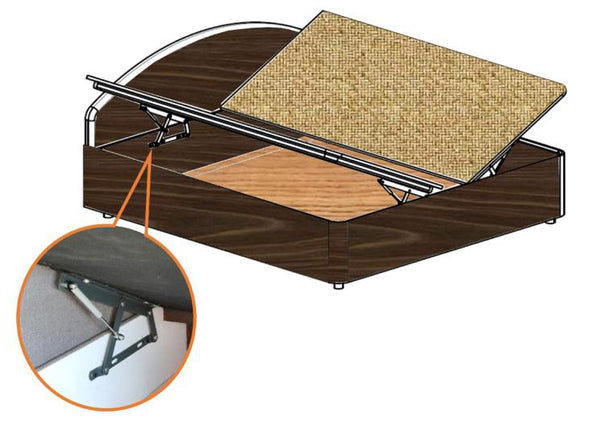
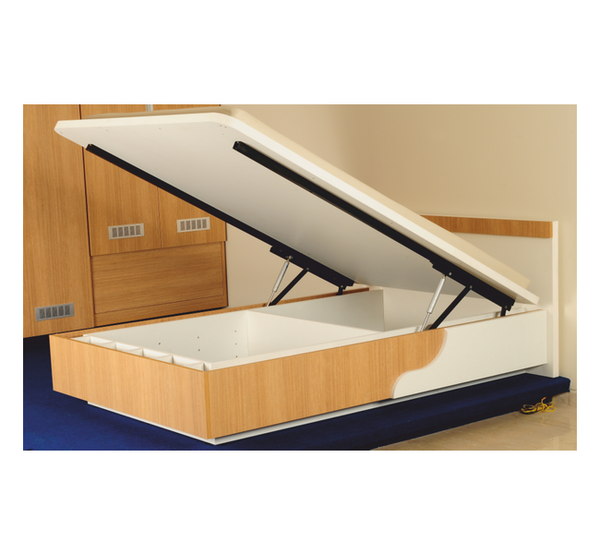
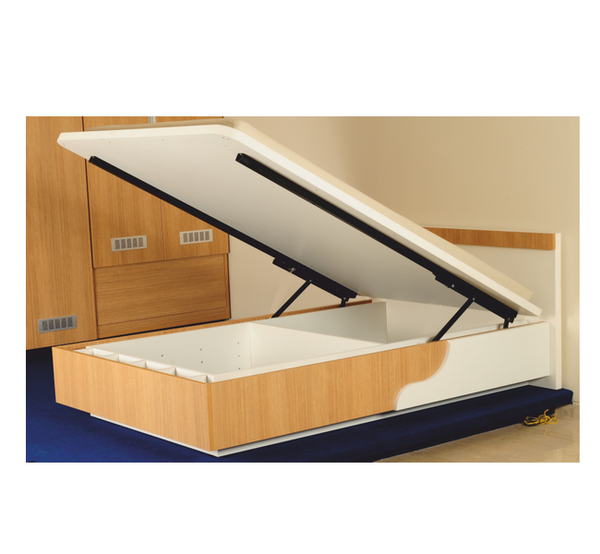
Rs. 1,671.00
FITTING INSTRUCTIONS
1. Fit the fix brackets on bed frame as per given dimensions (Ref.Fig.1) without the gas pump fitted.
2. Now fix the bed platform to the top brackets (Ref.Fig.2).
3. Lastly fit the gas pump as shown in the diagram (Ref. Fig.3).
Special Note :
Installation dimensions are only a recommendation and will vary depending on type of construction and design.
CAUTION
| Max Weight (Kgs) | Recommended Bed Size | |
| Width | Length | |
| 16.0 | 2.5 to 3 Feet | 2.5 to 3 Feet |
| Item | Item Code | Load Capacity | Finish |
| Pro-Lift Bed Fitting -Mini | |||
| PLBFM-30 | 300 N | Anthracite |

Rs. 3,360.00
| Specification | |
|---|---|
| Size | 5ft Extended Arm PLBF-EF-E, With PLBF 150C (KG) |
| Finish | Black |
| Set | Pair |
*If you have any specific question related to the product, please contact us.

Rs. 2,310.00
Ebco Livsmart Pro-Lift Bed Fittings 3Ft REGULAR PLBF-R WITH Gas Lift PLBF-75C (KG)
| Specification | |
|---|---|
| Size | 3ft regular PLBF-R, |
| Finish | Black |
| Set | Pair |
*If you have any specific question related to the product, please contact us.

Rs. 3,214.00
Ebco Livsmart Pro-Lift Bed Fittings-Extended Arm 5ft PLBF-E WITH GAS LIFT PLBF-150C (KG)
| Specification | |
|---|---|
|
Size |
5ft extended arm PLBF-E, PLBF-150c |
| Finish | Black |
| Set | Pair |
*If you have any specific question related to the product, please contact us.

Rs. 3,214.00
Ebco Livsmart Pro-Lift Bed Fittings-Extended Arm PLBF-E WITH PLBF-120C (KG)
| Specification | |
|---|---|
| Size |
5ft extended arm PLBF-E, PLBF-120c |
| Finish | Black |
| Set | Pair |
*If you have any specific question related to the product, please contact us.

Rs. 2,310.00
Ebco Livsmart Pro-Lift Bed Fittings-REGULAR PLBF-R WITH Gas lift PLBF-120C (KG)
| Specification | |
|---|---|
| Size | 3ft regular PLBF-R, |
| Finish | Black |
| Set | Pair |
*If you have any specific question related to the product, please contact us.

Rs. 2,310.00
Ebco Livsmart Pro-Lift Bed Fittings-REGULAR PLBF-R WITH Gas lift PLBF-150C
| Specification | |
|---|---|
| Size | 3ft regular PLBF-R, |
| Finish | Black |
| Set | Pair |
*If you have any specific question related to the product, please contact us.
Rs. 4,203.00
| Specification | |
|---|---|
| Size | 5ft |
| Finish | Black |
| Set | Pair |
*If you have any specific question related to the product, please contact us.

Rs. 4,203.00
| Specification | |
|---|---|
| Size | 5ft |
| Finish | Black |
| Set | Pair |
*If you have any specific question related to the product, please contact us.
Rs. 525.00
Special Features
Fitting Instructions

Rs. 537.00
Special Features
Fitting Instructions
Subscribe to our newsletter and always be the first to hear about what is happening.