Rs. 1,892.00
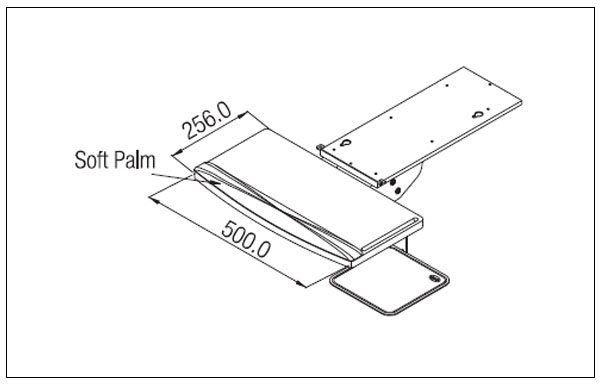
This new generation keyboard station is has a built in slide and keyboard holder.
Excellent for users who are at their computers for long periods of time (at home or at the office).
Stable, solid and durable design combined with elegant looks.
Low profile design for maximum leg room.
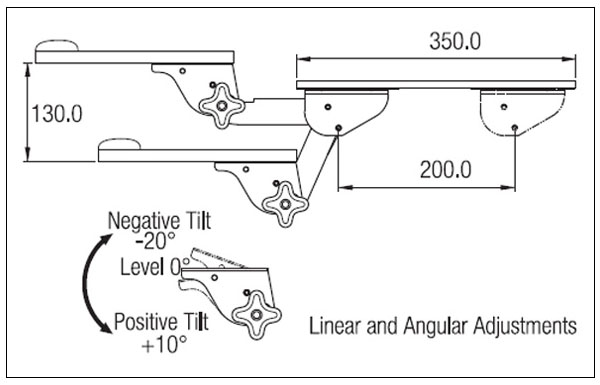
Adjustments can be made simultaneously – keyboard can be tiled and rotated to the angle that is most comfortable for the user.
Comes with a textured soft palm rest
Easy to assemble and transport.
Adjustments are spring assisted to help counter balance.
360° swivel allows user to move keyboard freely from side to side at his or her desk.
Available in Black Texture.
| Item | Type | Code | Finish |
| Articulated Keyboard Station Platform | With Mouse Tray | AKS1 | Black Texture |
*If you have any specific question related to the product & if you want to buy Sold Out products, please contact us.
Sold Out
| Model | Code | Slide Length(mm) | Extension(mm) | Gap/Side(mm) | Max. Load(Kgs) | Finish |
| Computer Keyboard Slide | CKDS-35 | 350 | 200 | 20 | 35 | Zinc Plated White / Black |
| Model | Code | Slide Length(mm) | Extension(mm) | Max.Load(Kgs) | Finish |
| Computer Keyboard Slide - Eco (I) | CKSE-35-I | 350 | 250 | 12 | Zinc Plated White/Bla |
Rs. 1,092.00
| Item | Type | Code Nos. | Finish |
| Computer Keyboard Tray | With Mouse Tray | KBT35M | Black Texture |
| Computer Keyboard Tray | Without Mouse Tray | KBT35 | Black Texture |
*If you have any specific question related to the product & if you want to buy Sold Out products, please contact us.
Assemble height adjustment brackets on to slides using M4 screw provided as in Fig. 1
2. Drill as per drilling diagram Fig. 2
3. Height adjustment bracket should be adjusted for desired height.
4. Screw the keyboard tray onto the table. Table should have minimum horizontal gap of 600mm.
5. Slide the keyboard tray out till it automatically latches.
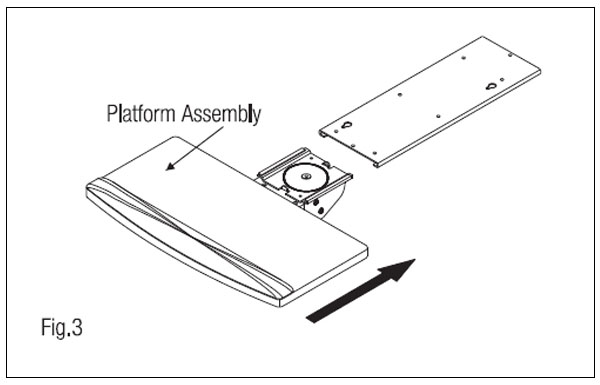
6. To remove tray lift ltaches provided on each sides and pull as per Fig. 3.


Rs. 7,144.00
| ITEM | ITEM CODE | SIZE | FINISH | PCS/SET |
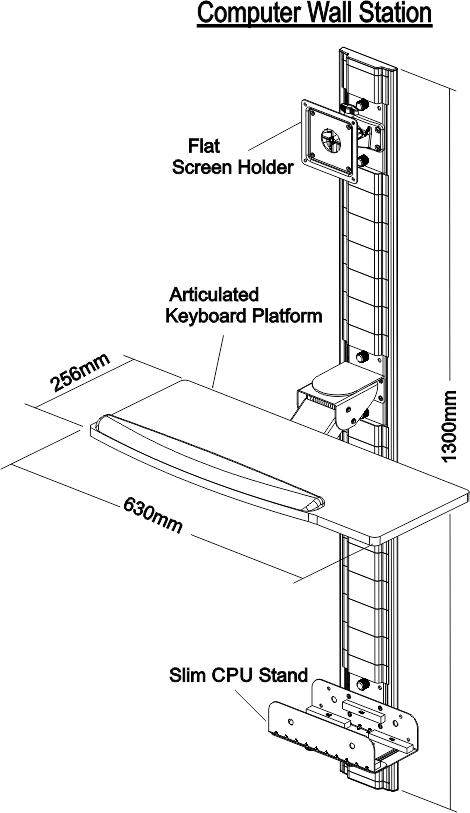
| Computer Wall Station | COMS-1 | 1300mm | Powder Coated | Set |
*If you have any specific question related to the product & if you want to buy Sold Out products, please contact us.
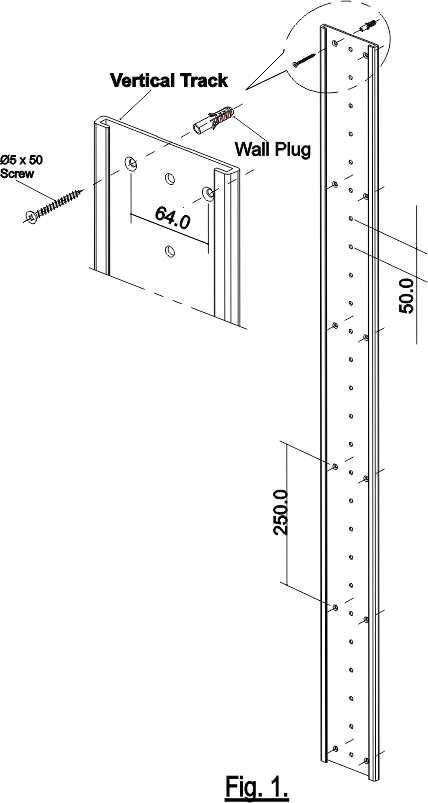
1.Fix the Vertical Track to the Wall plug & Screws provided as shown in Fig.1.
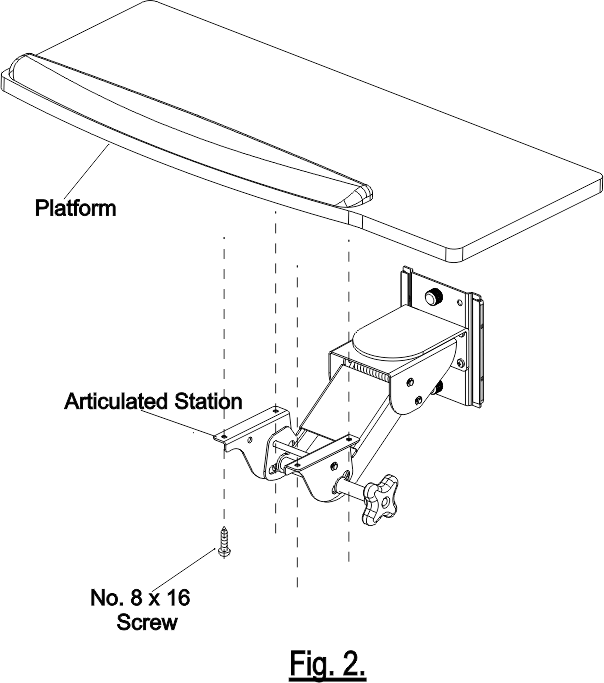
2.Fix the Platform to the Articulated Station using screws provided as shown in Fig.2.
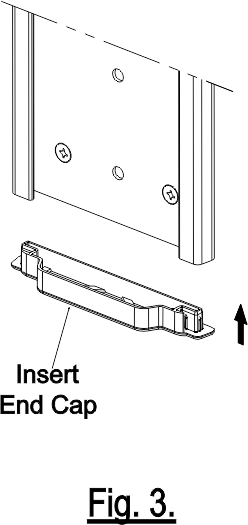
3.Insert the End Cap from bottom of the Vertical Track as shown in Fig.3.
4.Slide in one 50mm Cover from top to the Vertical Track as shown in Fig.4.
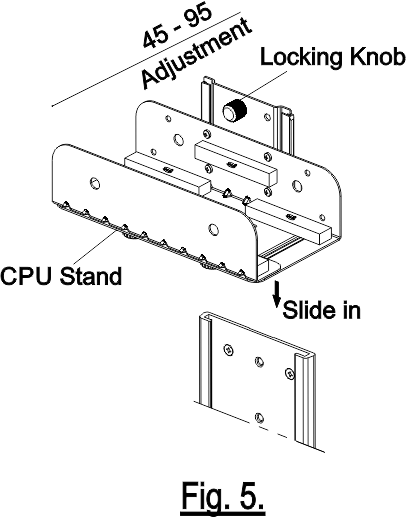
5.Slide in the CPU Stand Slim from top of Vertical Track as shown in Fig.5. & Tightened the Locking Knob. (While Tightening the Locking Knob always ensure that the Knob enters into the hole of the Vertical Track.)
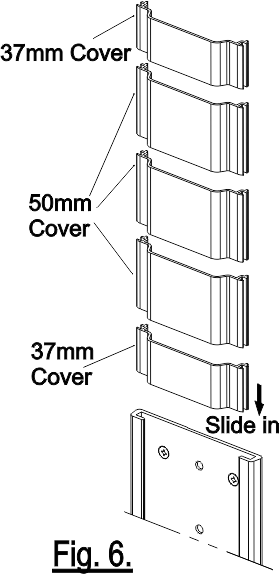
6. Slide in town 37mm Cover & Multiples of 50mm Cover to the Vertical Track to attain the desired height as shown in Fig.6.
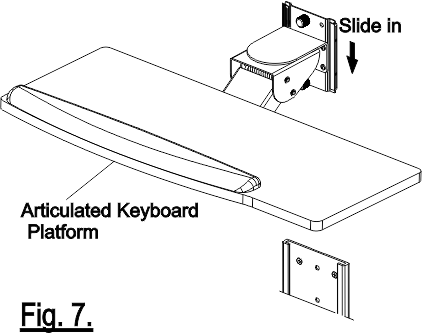
7.Slide in the Articulated Keyboard Station into the Vertical Track as shown in Fig.7. & Tighten the locking Knob.
8. Repeat the Procedure of Fig.6.
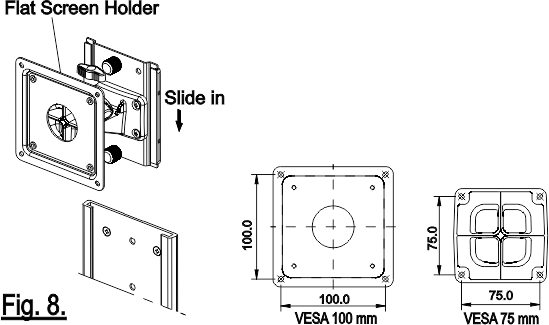
9.Slide in the Flat Screen Holder into the Vertical Track as shown in Fig.8. & tighten the Locking Knob.
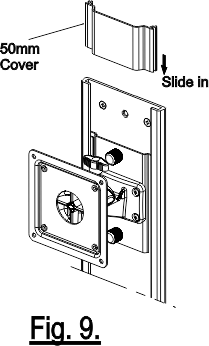
10.Slide in one 50mm Cover into the Vertical Track as shown in Fig.9.
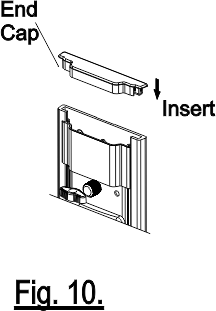
11.Insert the End Cap from top of the Vertical Track as shown in Fig.10.


Rs. 5,316.00
| ITEM | ITEM CODE | SIZE | FINISH | PCS/SET |
| Computer Wall Station | COMS-2 | 800mm | SL/WW/AT | Set |
*If you have any specific question related to the product & if you want to buy Sold Out products, please contact us.
Fix the Vertical Track to the Wall plug & Screws provided as shown in Fig.1.
2.Fix the Platform to the Articulated Station using screws provided as shown in Fig.2.
3.Insert the End Cap from bottom of the Vertical Track as shown in Fig.3.
4.Slide in one 50mm Cover from top to the Vertical Track as shown in Fig.4.
5.Slide in the CPU Stand Slim from top of Vertical Track as shown in Fig.5. & Tightened the Locking Knob. (While Tightening the Locking Knob always ensure that the Knob enters into the hole of the Vertical Track.)
6. Slide in town 37mm Cover & Multiples of 50mm Cover to the Vertical Track to attain the desired height as shown in Fig.6.
7.Slide in the Articulated Keyboard Station into the Vertical Track as shown in Fig.7. & Tighten the locking Knob.
8. Repeat the Procedure of Fig.6.
9.Slide in the Flat Screen Holder into the Vertical Track as shown in Fig.8. & tighten the Locking Knob.
10.Slide in one 50mm Cover into the Vertical Track as shown in Fig.9.
11.Insert the End Cap from top of the Vertical Track as shown in Fig.10.


