View All
'System 32" Compatible
100X505X432
104mm
120X600MM X50KG
122X300MM X50KG
122X350MM X50KG
122X400MM X50KG
122X450MM X50KG
122X500MM X50KG
122X550MM X50KG
128mm
150x505x432
160mm
16mm
16mm-20mm
192mm
2000mm
200x505x432
20PCS
224mm
22mm Lock
24-30mm
25mm
268 x 119 x 51 mm
297-351 x 390-490
2MM
300mm
30mm
320mm
347-401 x 390-490
35 mm
350mm
397-451 x 390-490
3D Auto Hinges
3D Mounting Plate
3MM
4 Digit Combination Lock
4 Digit Combination Lock - Wood (Vertical)
400mm
450 mm
450mm
5 Litre
500mm
504-540 x 430-490
550mm
600mm
64mm
800-840 x 430-490
84 X 84 MM
96mm
AB
Adjustable Glass Shelf Support
ALUMINIUM
Aluminium Handle -c
Aluminium Handle -C3-1
Aluminium Handle -G
Aluminium Handle -I
Anodized Gold
anthracite
Antique
Antique Brass
AT
Auto Hinges
Basket
Bathroom
bathroom drawer system
Bathroom Drawers and Office Storage Drawers.
BED FITTING
Bedroom
Below 64 mm
Below Rs. 1000
Below Rs. 2000
Below Rs. 3000
Black
Blind corner Hinge - 3D-Soft close
BRASS
Brown
Brush
Brushed Aluminium
Brushed Steel
cabinet handle
Cabinet Hinges
Cabinet Lock
cable organizer
Cam Lock
Can Fit Indoor & Outdoor.
Champagne
Champagne Gold
Chrome Plated
CL
Clothes Dryer
CMA-DA
CMA-DEA-AT
Combination Lock
Commercial
computer
Computer Furniture Fittings
computer hardware
Computer Keyboard Slide
Computer Monitor Arm
computer table
Concealed Corner
Concealed Corner Hinge
concealed electric box
CP
cpu stand
Depth 845mm x Width 5-6 ft
Desk Organizer
Door
Door Eye
Door Hardware
Door Latch
DOOR OPENER PEDAL
Door stiffener
Door straightener
Door View
Double Screen
Drawer
Drawer Lock
Drawers & Wardrobes
Dual Monitor
durable
Durable & easy to fit.
Durable steel construction
Each
Easy to fit & use
easy to install
EB-8MS
EB-8MSCS
Ebco
ebco aluminium profile shutter
Ebco Auto Hinges
Ebco Concealed Corner Hinge
ebco door stiffener
ebco door straightener
Ebco Lock
Ebco Plastic Keyboard Tray
EBCO Recessed Hinge
EBCO Sink Drain Basket
Ebco Sofa & Furniture Leg 2
Ebco Sofa & Furniture Leg 3
Ebco Sofa & Furniture Leg 4
Ebco Sofa & Furniture Leg
EBCO Thick Door Hinge
EBCO Thick Door Hinge 15-35mm
EBCO Thick Door Hinge 15-35mm With 3D Mounting Plate
Ebco Wardrobe Lock 3 Point
electric box
Electric Box - Slide Out
Elegant Detergent Holder Stand
Ergonomic
Euro Groove
Floor Spring Accessories
fold-away
Foldable Design saves Space
Folding Table
Folding Table Mechanism
FOLDING TABLE MOUNT
Front Multi Drawer
FTM1
furniture drawer system
Furniture leg
Furniture Lock
Glass Corner Holder
Glass Door Handale
glass door handle
Glass Door Lock
Glass Holder
Glass Shelf Support
Glass Side Holder
Gold
Grey
Grey/Black
Grommet Mount
Hardware
Hardware Fittings
hinge
hinges
Home
Home & Office
home drawer system
Home Office
Hotel Appliance Tool
Ideal design for drying Towel / Clothes
Ideal for square or round tables
Indoor
It converts a sofa into bed.
ivory
joinery fittings
KDR-18T
KDR-20T
keyboard base
keyboard tray
kitchen
KITCHEN CUTLERY TRAY
Kitchen Drawer Rack - Thali
kitchen drawer system
Kitchen Drawers
Kitchen Hinges
kitchen organizer
Kitchen Shutters Hinges
kitchen tower
Knobskart
Living Room
Livsmart
Main Door
Metal Detergent Holder
Metallic Grey
MICRO BIN 2
mini fix
modular kitchen
Monitor Arm
Monitor Stand
Multi Purpose Lock
Multi Purpose Lock - Round Cranked
Multi Purpose Lock - Round Cranked with metal Keys
Multi Purpose Lock - Round Straight
Multi Purpose Lock - Round Straight with metal Keys
Network Socket
Nickel
Nickel Plated
Nickel Plated Satin
Nylon
OFFICE
office drawer system
Office Furniture
Office Furniture Lock
office table
offices
P-WL1-22 -25
P-WL1-32-25
patch fittings
PEDESTAL CASTOR
Pedestal Lock
Perfect for folding & storing tables
Plastic
Plastic Wicker Basket
plated
powder Coated
PRO-LIFT
Pro-Lift - Sofa Bed Fittings
Pro-Lift Sofa Bed Fittings with Guide Track
Pro-motion Drawer System 122 - S3
pull-out basket
Push Open Fittings - Stroke & Magnetic
quiet operation
Recessed Handle
Recessed Hinge
Requires castors to slide out.
Residential
Round Lock
round multi lock
Rs. 1000 - Rs. 4000
Rs. 10001 - Rs. 20000
Rs. 1001 - Rs. 2000
Rs. 20000 and Above
Rs. 2001 - Rs. 4000
Rs. 4001 - Rs. 6000
Rs. 6001 - Rs. 10000
Satin Stainless Steel
Secutek Front Multi Drawer
shelves
Shower
Shower Sliding
Shower Sliding Fitting
Shower Sliding Fitting - Rectangle
Shutter Profile
shutters
Side Pullout Frameless 2 Tier
Silver
SL
sliding door lock
Sliding Wardrobe Lock
Sliver
Sofa Leg
Soft Close
Space Saving
Special Finish
SS 304
SS304
Stainless Steel
Symmetrical
TABLE BRACKET
tables.
tablet holder
Telephone Sockets
tray
Turn table mechanism
Universal Power Sockets
USB Charger Sockets
Utility Corner Bracket
Utility Table
versatile
VESA
Walk-In Sliding Lock
Walking wardrobe
Wall Mounted Folding Drying Rack
Wall Mounted Table
WARDR PULLOUT HANGER - TROUSER / SAREE - SINGLE
Wardrobe Hinges
Wardrobe Lock 3 Point
wardrobe shutter straightener
wardrobe straightener
Washbasin
Waste Bin
WH/AT
white
wicker basket
Wireless
work station tray
Worksmart
ZINC
ZY
Featured
Best Selling
Alphabetically: A-Z
Alphabetically: Z-A
Price: Low to High
Price: High to Low
Date: New to Old
Date: Old to New
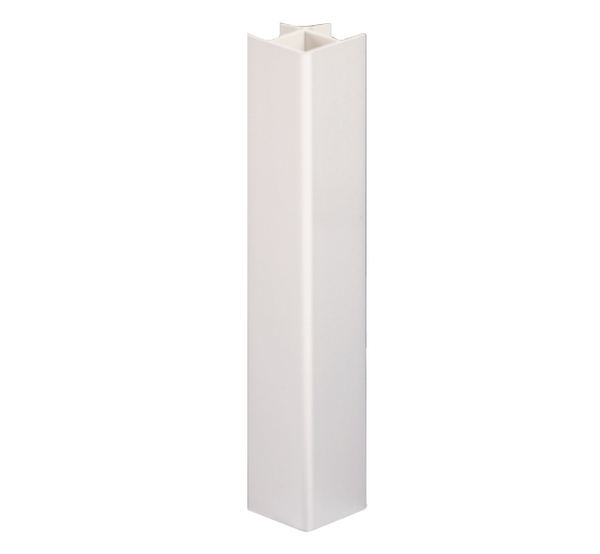
Ebco Livsmart Corner Joint Front / Reverse 90º 150mm CJ90
Rs. 128.00
Corner Joint Front / Reverse 90 degree
Available in 100mm heights.
Finish : Black, Silver.
Specification
Finish Black, Silver
Size
100mm
*If you have any specific question related to the product, please contact us .
As per store shipping policy .
View full product details »
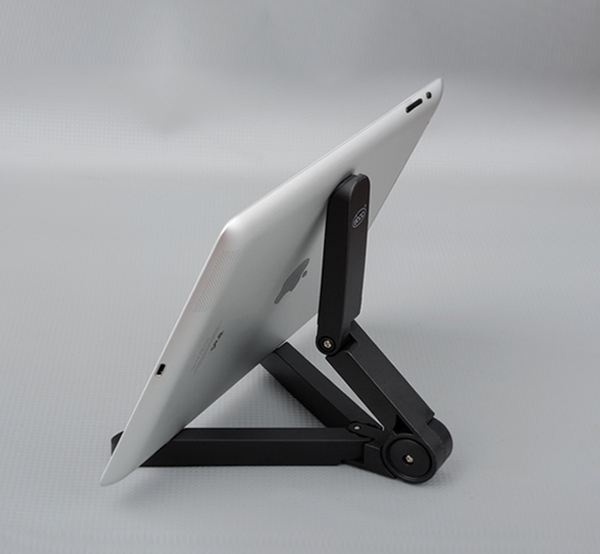
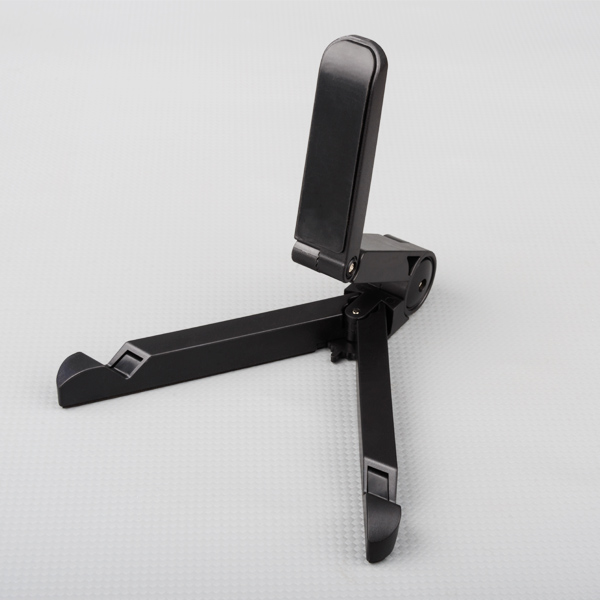
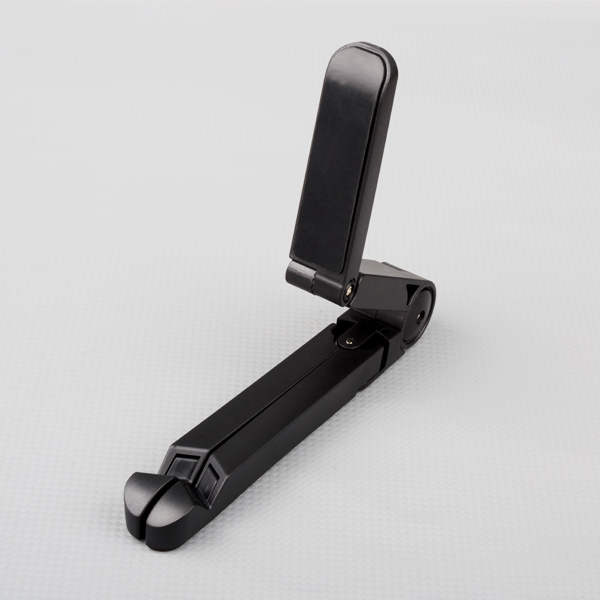
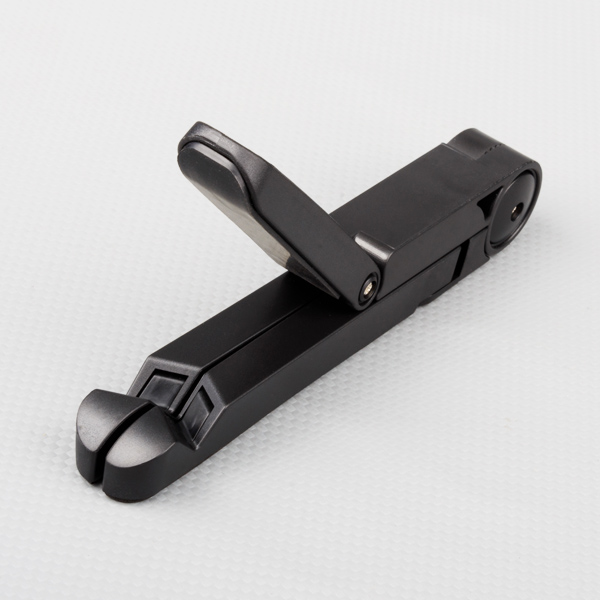
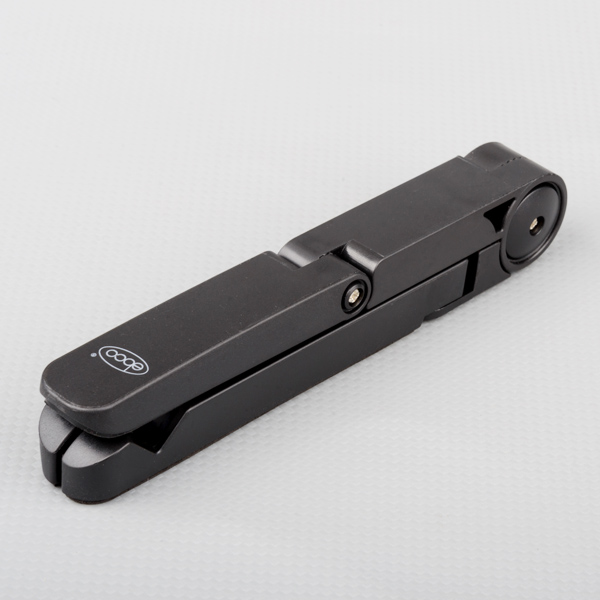
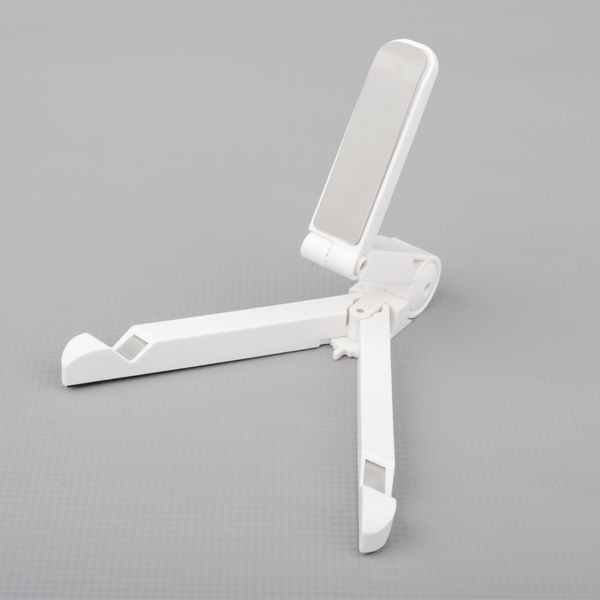
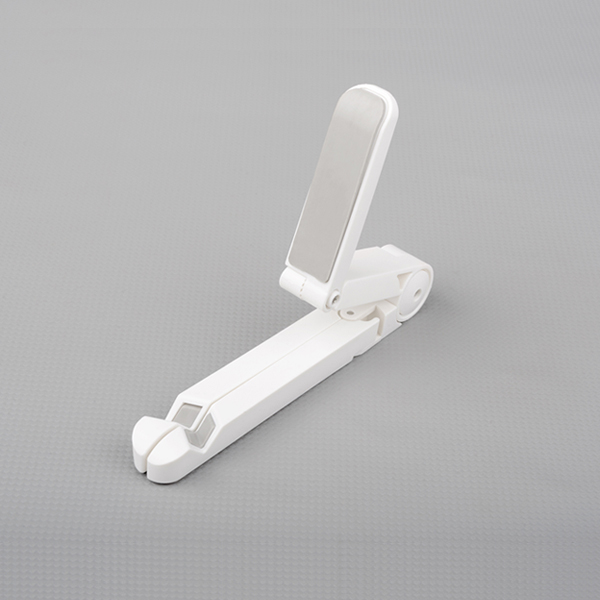
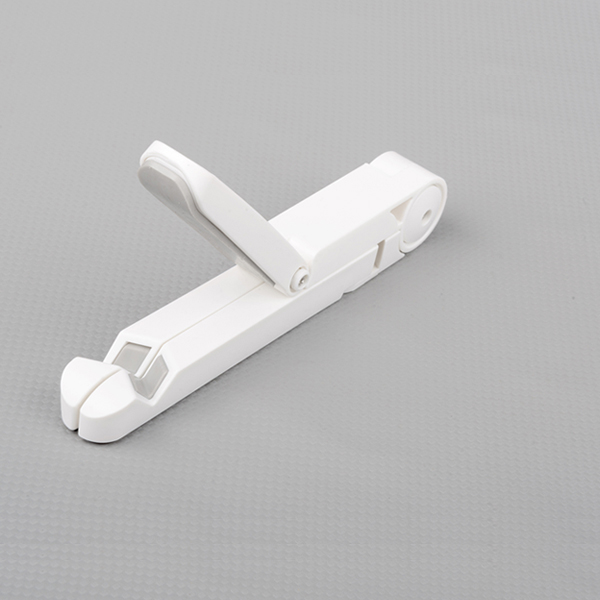
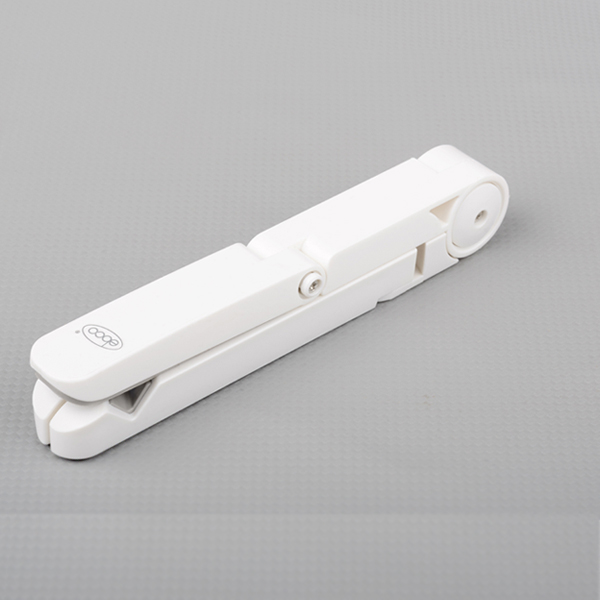
Ebco Tablet Holder TH1
Rs. 494.00
*If you have any specific question related to the product & if you want to buy Sold Out products, please contact us .
Overview
For Apple iPad, Kindle Fire, Galaxy Tab & other 7” – 10” tablet PC’s
Foldable, compact & easy to carry around
Flexibility to position your device in multiple angles in landscape or portrait view
Size: 18cm x 2.6cm x 3.2cm
As per store shipping policy. If you need any other finish please contact our sales team .
View full product details »
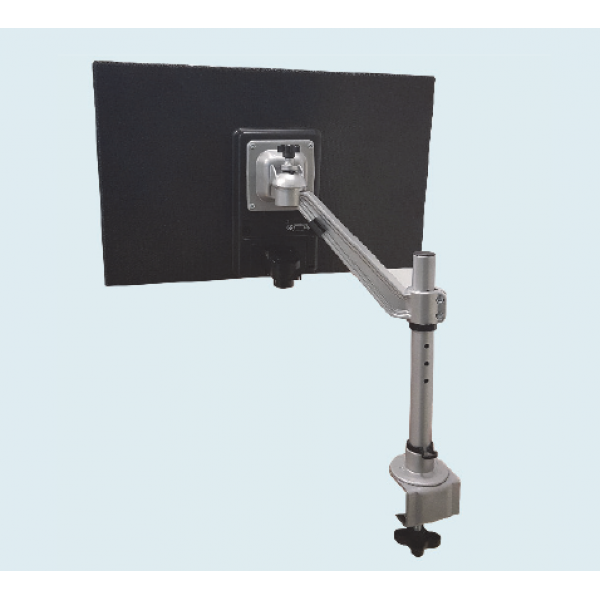
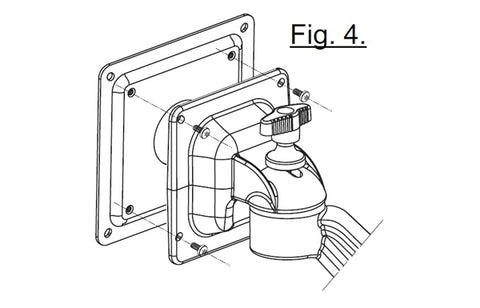
Ebco Flat Screen Holder Single Arm- Edge Mount FSHSA-EM
Sold Out
SPECIFICATIONS
Model
Code
Finish
Flat Screen Holder Single Arm - Edge Mount
FSHSA - EM
Black / Silver / White Texture / Anthracite
*If you have any specific question related to the product & if you want to buy Sold Out products, please contact us .
Overview
Table top edge mounting with single arm.
No drilling of holes required.
Height adjustment of 100mm.
Compatible for VESA 75 x 75 & VESA 100 x 100 with an extra plate.
Die cast for good aesthetics.
Can be rotated towards left & right as well as tilted up & down with a single knob.
Load capacity: < 7 kilograms
FITTING INSTRUCTIONS
As per store shipping policy. If you need any other finish please contact our sales team .
View full product details »
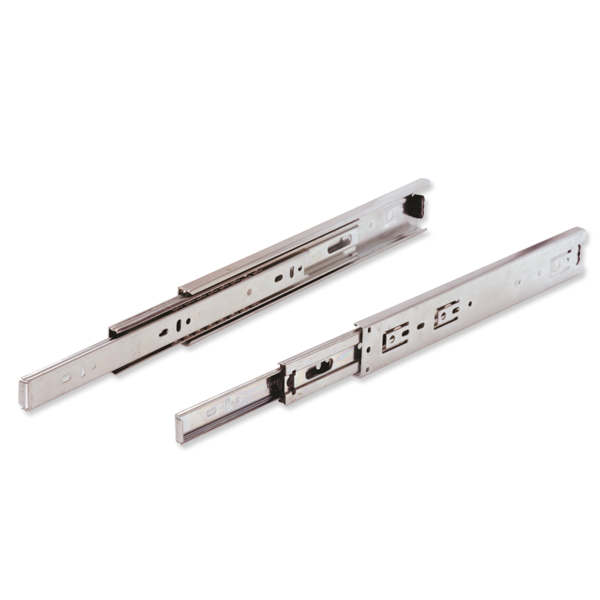
Ebco Sleek Telescopic Drawer Slide (I) 45
Rs. 320.00
Precision telescopic slides.
Full extension of drawer.
Load capacity: STDS (I) 45=45Kgs.
Direct fitting from front.
Removable drawer with Latch
System 32 installation.
*If you have any specific question related to the product, please contact us .
To install sleek telescopic drawer slide 12.7 to 13.0mm gap per side is required between cabinet and drawer. (Refer Fig. 1)Depress latch and remove the inner slide. (Refer Fig. 2)Fit outer (fixed) slide onto the inside of the cabinet, access to holes can be got through slots in intermediate slide.Slides should be fitted parallel and screws tightened fully to avoid gaps.Fit inner slide onto the outside of the drawer.Now slide the drawer with inner slide fitted on to the intermediate slides on the cabinet till the latch will automatically engage.
View full product details »
Ebco Combination Lock -Pedestal 4 Digit P-CLP4-18
Rs. 656.00
Special Features:
Four Digit Combination Lock for Keyless Operation. Replace any standard furniture lock to get instant keyless access. Once unlocked, the housing doubles as a knob; just rotate 90° to unlatch. The combination can be reset to any four digit number, providing up to 10000 possible combinations. Two levels of code setting: Combi - Public and Combi - Personal. Resolve forgotten secret code easily & rapidly with secret code retriever key. Quick - Fix System; easy to install. One universal lock for wooden (16mm-20mm) and metal furniture. Textured black finish. Ideal for Corporate Offices, BPOs, Banks, Home Furniture: - Wardrobe, Kitchen etc., Lockers: - Club, Gym, Hostel, Factory, etc. Retail Showrooms, Display Units – Watches, Jewellery, Gadgets, etc.
Specification:
Item
Code
Size
Finish
Combination Lock -Pedestal (16-20mm)
P-CLP4-18
16-20mm
AT
View full product details »
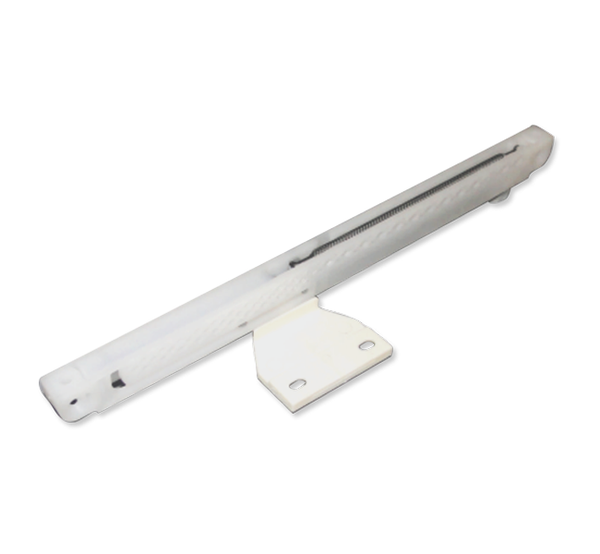
Ebco Soft Close Kit for Full Panel - FP-SCK3-15 - Each
Rs. 240.00
Special Features
Designed to use with Full Panel Drawer Slides. System 32 compatible.
Soft closing system.
Actuator load rating: 15 kgs.
Fitting Instructions
Fit the soft close system on the cabinet and the Actuator on the drawer as shown in Fig. 1. For dimensions refer Fig. 1 & Fig 2.
Code No.
Max. Load
Finish
FP-SCK3-15
15 kgs
White
View full product details »
Ebco Full Panel Quick Fit (Ht. 54,86,125mm) -FPQ - Set of 5 Pcs
Rs. 486.00
A
B
C
D
54
71
52
32
86
103
84
64
125
142
123
96
*If you have any specific question related to the product, please contact us .
Special Features
A unique new way to assemble a drawer by clipping on a matching back panel.
This not only improves the look of the drawer but also saves valuable time during assembly and brings down cost.
Tilt and remove capability with guiding.
Auto closing of drawer
Front fascia adjustment.
Precision rollers for smooth running.
'System 32' compatible.
Fitting Instructions
Side gap of 15.5mm is required and acts as side panel of drawer (Fig.1). Eccentric Cam for front facia height adjustment provided in 86mm and 125mm height Full Panels with 6mm bottom track (Ref. Fig 2)
25.4mm clearance from top edge of drawer required to tilt and remove drawer (Refer Fig. 2).
Fixed slide should be set by 2mm for 'Auto-Closing' (Fig. 2).
Screws should be recessed to avoid fouling.
Fixed slides should be fitted parallel and at equal heights to each other.
Insert the Rear panel onto the Side panels through the key slot provided in the side panels (Ref. Fig.3).
Place the bottom flap through the track provided in the Side panels and fix the front facia with the Bracket and insert the unit onto fixed slides which are fitted internal sides of cabinet (Ref. Fig.4).
As per store shipping policy .
Caution For efficiency and Durability
Strictly maintain side gap of 15.5mm per side Fix slides are parallel and at equal height
Do not apply paint or polish
View full product details »
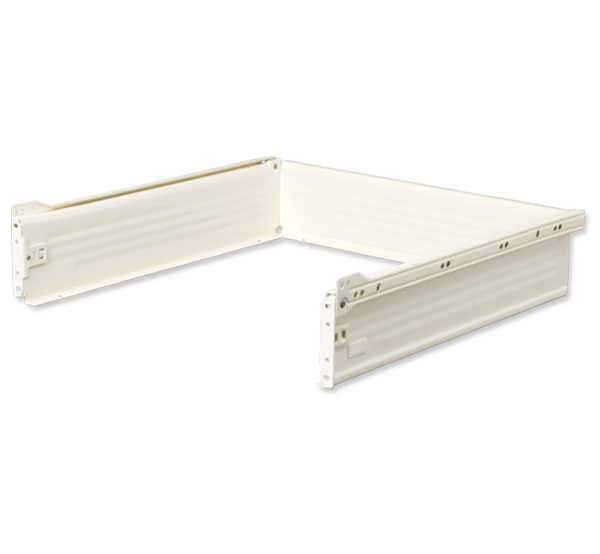
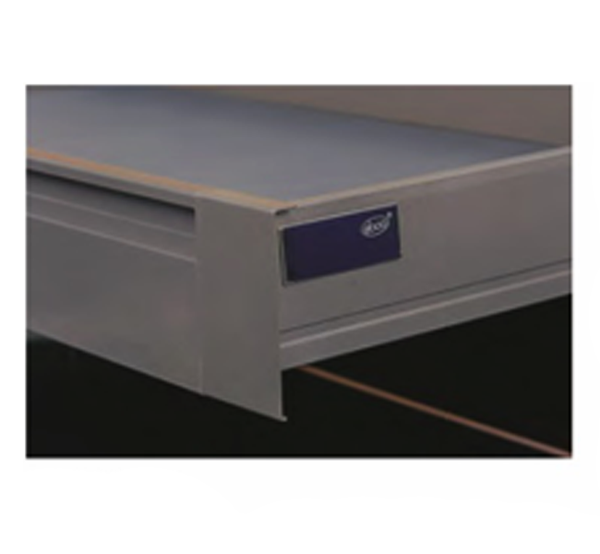
Ebco Full Panel (54mm, 86mm & 125mm) - FPDS - Set of 4 Pcs
Rs. 344.00
54
86
125
FPDS 54-35
FPDS 86-35
FPDS 125-35
350
275
FPDS 54-40
FPDS 86-40
FPDS 125-40
400
325
FPDS 54-45
FPDS 86-45
FPDS 125-45
450
375
FPDS 54-50
FPDS 86-50
FPDS 125-50
500
425
FPDS 54-30
FPDS 86-30
FPDS 150-35
350
275
*If you have any specific question related to the product, please contact us .
Special Features
Simplifies construction of drawer as it eliminates the sides of drawer. Saves wood, labor, drawer space.
Tilt and remove capability with guiding.
'Auto closing' of drawer.
Front fascia height adjustment.
Ribbed for strength.
Precision rollers for smooth running.
Load capability - 25 kgs.
"System 32" compatible.
Stopper prevents drawer from falling.
Fitting Instructions
Side gap of 15.5 mm per side is required and acts as side panel of drawer. (Refer fig 1). Clearance of 25.4mm from top edge of drawer required to tilt and remove drawer. (Refer fig 2).
Fixed slide should be set by 2mm for auto-closing. (Refer fig 2).
Screws should be recessed to avoid fouling.
Fixed slides should be fitted parallel and at equal height to each other.
Front fascia is to be fitted into front brackets which have 2-way adjustment for alignment.
As per store shipping policy .
View full product details »
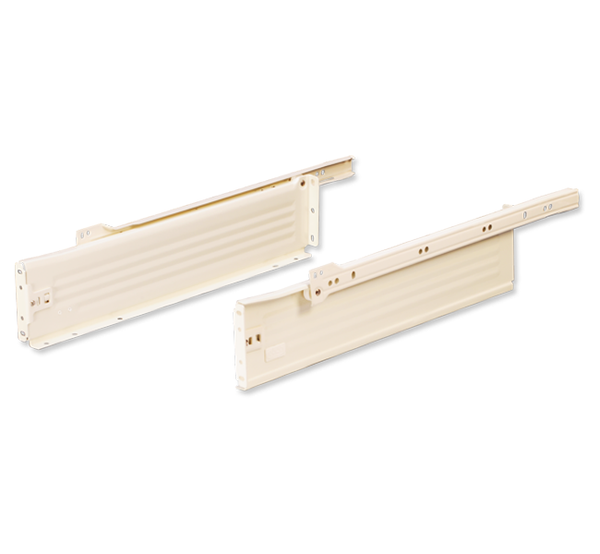
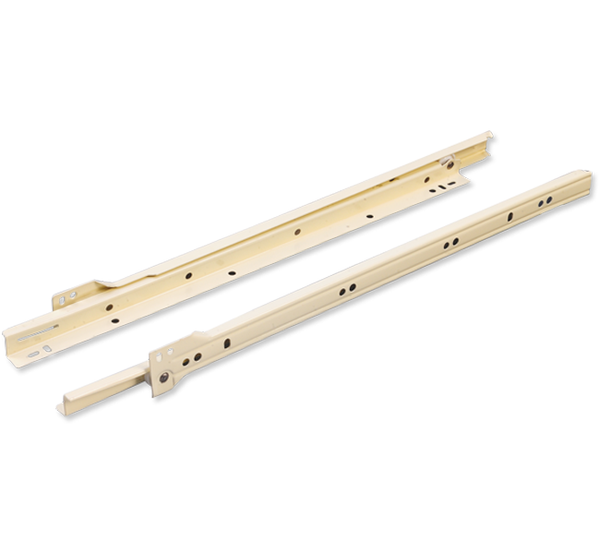
Ebco Bottom Mounting Drawer Slides - BMDS
Rs. 178.00
Special Features
New smooth silent roller system. Right side pair has lateral guiding.
Left side pair has side gap adjustment.
Tilt and remove drawer.
Stopper to prevent drawer from falling.
New "Auto-Closing" feature of drawer.
"System-32" Compatible.
Ribs provided for strength.
Load capability - 20 Kgs.
Fitting Instructions
Side gap of 12.7 mm (1/2") per side required (Refer fig. 1). 25.4 mm (1") clearance from top edge of drawer required to tilt and remove drawer (Refer fig. 2).
Fixed and moving slide should be equally offset by 2 mm for Auto-Closing (Refer fig. 2).
Recess screw heads to avoid interference.
A set of slides must be fitted parallel and at same heights to each other.
Finish
Ivory Brown
Black
View full product details »
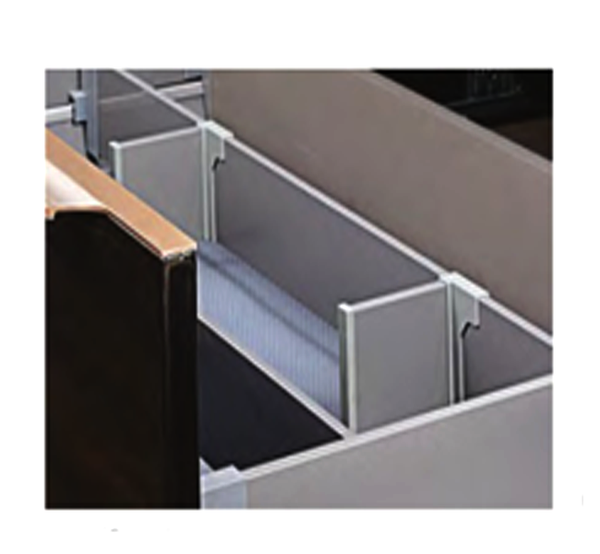
Ebco Livsmart Facia Handle Profile
Rs. 3,643.00
Features:
Available Heights:2000 mm. Facia Panel System for internal Drawers.
Sleek Straight Line Design & Sturdy.
Load Capacity:65kgs for 500mm & 550 mm and 30 kgs for 450mm & 400mm.
Options for Glass and side panel with full kit.
Options of Drawer Partition System.
Specification
Pro-Motion Drawer System Organisers
Finish Silver Grey , White, Anthracite.
Size
2000 mm
Pcs./set
Each
Product Type Kitchen Organizer
*If you have any specific question related to the product, please contact us .
As per store shipping policy .
View full product details »
Ebco Livsmart Facia Connector -D for PMDS1(N)
Rs. 467.00
Features:
Available Heights:104 mm. Facia Panel System for internal Drawers.
Sleek Straight Line Design & Sturdy.
Load Capacity:65kgs for 500mm & 550 mm and 30 kgs for 450mm & 400mm.
Options for Glass and side panel with full kit.
Options of Drawer Partition System.
Specification
Pro-Motion Drawer System Organisers
Finish Silver Grey , White, Anthracite.
Size
450mm,500mm,550mm.
Pcs./set
SET
Product Type Kitchen Organizer
*If you have any specific question related to the product, please contact us .
As per store shipping policy .
View full product details »
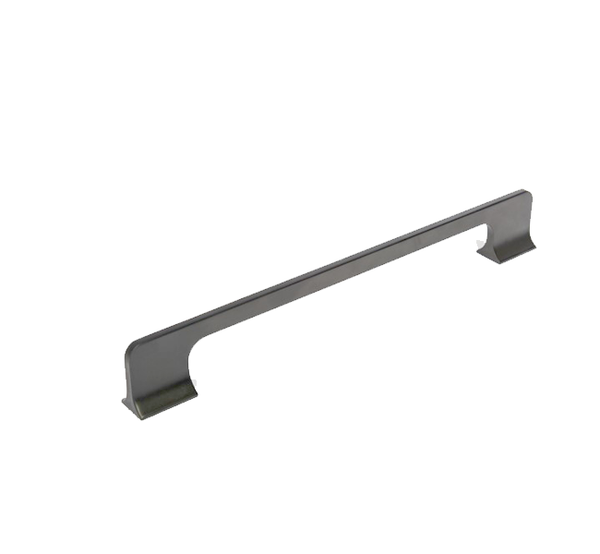
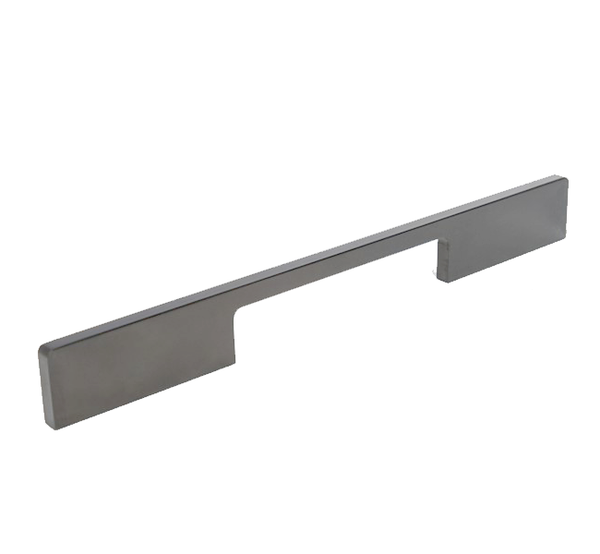
Ebco Livsmart Aluminium Handle -C3-AH2
Rs. 244.00
Ebco Livsmart Aluminium Handle -C3-AH2
Variety of designs to select from.
Ergonomically designed for good grip.
Available in different lengths as per system - 32.
Various Finishes.
Specification
Finish AB
Pcs./set
Each
*If you have any specific question related to the product, please contact us .
As per store shipping policy .
View full product details »
Ebco Aluminium Handle -C2 Anodized Silver
Rs. 446.00
Variety of designs to select from.
Ergonomically designed for good grip.
Available in different lengths as per system - 32.
Various Finishes.
Specification
Finish Anodized Silver
Pcs./set
Each
*If you have any specific question related to the product, please contact us .
As per store shipping policy .
View full product details »
Ebco Aluminium Handle -C2 CP
Rs. 674.00
Variety of designs to select from.
Ergonomically designed for good grip.
Available in different lengths as per system - 32.
Various Finishes.
Specification
Finish CP
Pcs./set
Each
*If you have any specific question related to the product, please contact us .
As per store shipping policy .
View full product details »
Ebco Sliding Window Latch - Cranked (with SWL5-CP) - SWL 5 - Set of 2
Rs. 537.00
Special Features
Ideal for 19mm (3/4") section.
Available as a pair for left and right hand sliding windows.
Designed to engage automatically with a spring loaded slide catch.
It also has a unique safety lock switch.
Also available with Cranked Hook for 25mm (1") section.
Fitting Instructions
Body is fitted onto the sliding window shutter (Refer Fig 1).
It is fitted into a cavity of 19mm * 172mm (Refer Fig 2).
An opening of 13mm * 25mm is required in the width of the section for the catch to engage with the hook (Refer Fig 2).
Catch is fitted on the inside of the frame such that is engages with the hook whwn window is shut (Refer Fig 3).
Hook can be unscrewed and shifted horizontally to suit different sections. (Refer Fig 4)
View full product details »
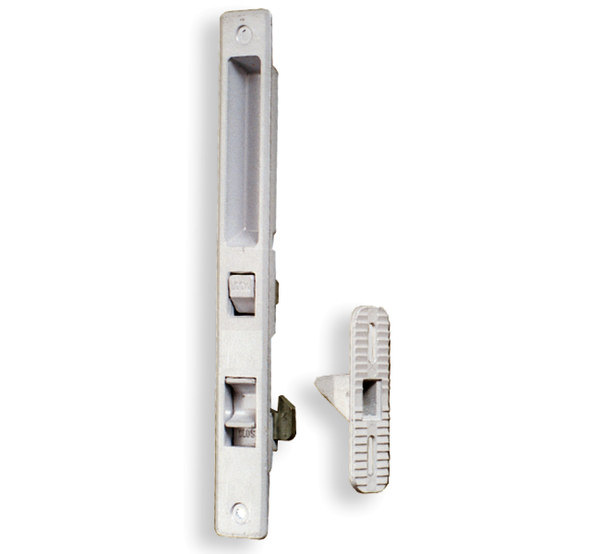
Ebco Sliding Window Latch - Slide Catch (with SWL 4-C) - SWL 4 - Set of 2
Rs. 560.00
Special Features
Ideal for 19mm (3/4") section.
Available as a pair for left and right hand sliding windows.
Designed to engage automatically with a spring loaded slide catch.
It also has a unique safety lock switch.
Also available with Cranked Hook for 25mm (1") section.
Fitting Instructions
Body is fitted onto the sliding window shutter (Refer Fig 1).
It is fitted into a cavity of 19mm * 172mm (Refer Fig 2).
An opening of 13mm * 25mm is required in the width of the section for the catch to engage with the hook (Refer Fig 2).
Catch is fitted on the inside of the frame such that is engages with the hook whwn window is shut (Refer Fig 3).
Hook can be unscrewed and shifted horizontally to suit different sections. (Refer Fig 4)
View full product details »
Ebco Sliding Window Latch (with SWL 1-C) - SWL 1 - Set of 2
Rs. 525.00
Special Features
Ideal for 19mm (3/4") section.
Available as a pair for left and right hand sliding windows.
Designed to engage automatically with a spring loaded slide catch.
It also has a unique safety lock switch.
Also available with Cranked Hook for 25mm (1") section.
Fitting Instructions
Body is fitted onto the sliding window shutter (Refer Fig 1).
It is fitted into a cavity of 19mm * 172mm (Refer Fig 2).
An opening of 13mm * 25mm is required in the width of the section for the catch to engage with the hook (Refer Fig 2).
Catch is fitted on the inside of the frame such that is engages with the hook whwn window is shut (Refer Fig 3).
Hook can be unscrewed and shifted horizontally to suit different sections. (Refer Fig 4)
View full product details »
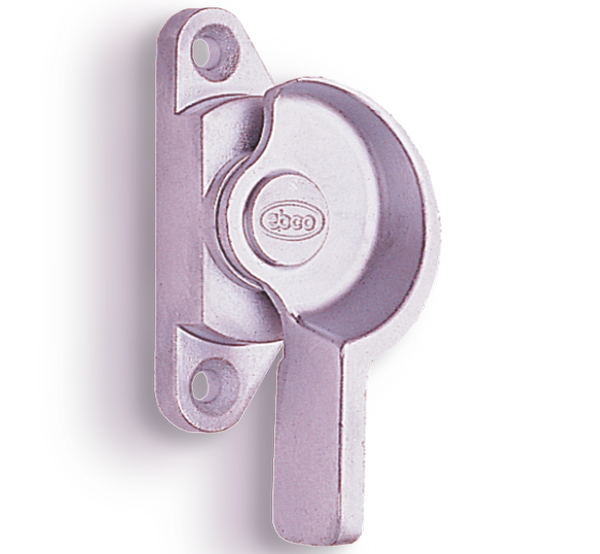
Ebco Windows Crescent Latch
Rs. 131.00
A unique lock for sliding windows.
Easy locking and unlocking by simple half rotating, clock-wise or anti clock-wise.
Eliminates the need for handles.
Available for both right and left hand locking.
Code Nos.
Finish
Clasp
Available
CRL 1(L/R)(S/Z/F)
Zinc White
S- Clasp with M4
Left hand and
CR 2(L/R)(S/Z/F)
Powder Coated - Brown, Ivory, Silver, Black
* Add L or R for left or right hand.
# Add S for S-clasp, Z for Z-clasp and F for flat clasp.
View full product details »
EBCO Windows Handle-EURO E-WH1 (L/R)
Rs. 88.00
Designed with aesthetic look. Designed for strong and comfortable grips for windows.
Left and Right hand movements.
Wedges are inbuilt in handles, No need of screwing wedges onto frame.
Easy to fit.
Specification
Windows Fitting
Finish BR/BL
Pcs./Set
PC
View full product details »
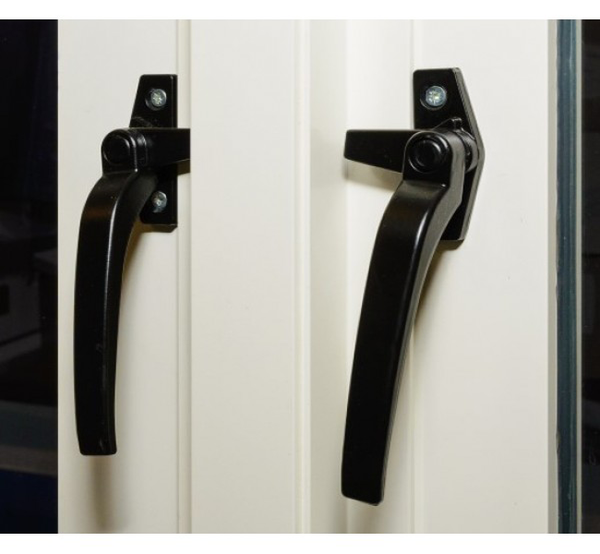
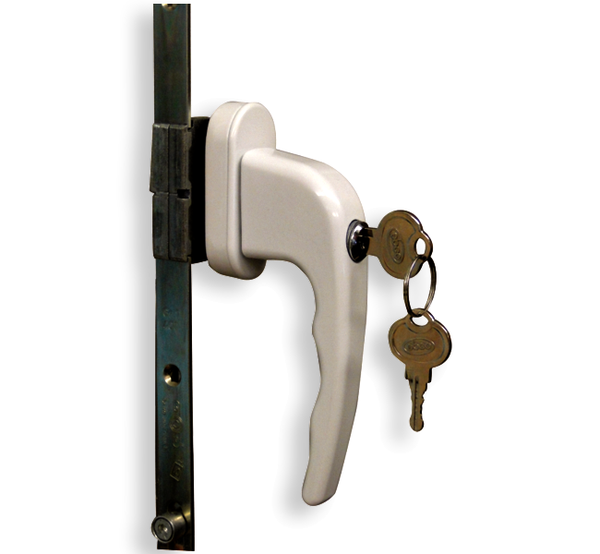
Ebco Mortize Window Handle With Lock
Rs. 197.00
Designed with aesthetic look.
Designed for strong and comfortable grip for windows.
Available for both left & right hand locking.
Special wedges supplied with handles.
Special packing's of different heights provided.
Specification
Code No. Finish
AWH-DML3 (L/R)
P.C. (black, silver, brown & white)
View full product details »